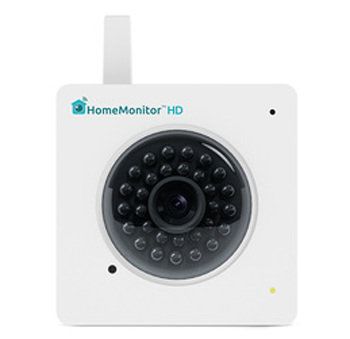
A follow-up unit to the Y-Cam HomeMonitor Indoor unit, we were interested to check out the HD version. Realistically, any chance anyone has to use HD security cameras they should – at least 720p high definition which, this HomeMonitor HD IP-camera is (model number HMHDI05).
Box contents of this product include the Y-Cam HomeMonitor-HD camera itself, a wall-ceiling mount that also works as a stand, a power adaptor with 10 foot of power supply cable, a network cable, and a mounting screws. The unit itself is the same dimensions as the previous HomeMonitor model with the only real difference being the ring of LEDs on a black background.
The camera is a 720p HD camera, 1280 x 720 pixels. That is not 1080p just yet but the difference it makes is quite big compared to the 640?480 resolution of the previous version. This unit also delivers a wider angle of view (107 degrees) with improved night vision.
Setting up the camera requires plugging it into a power socket and connecting it up to a broadband router and thus into a network. Power up the camera and wait for the light on the front of the camera to turn green.
When setting up for the first time the front light on the camera may flash red instead of the expected green. The Y-Cam support site says to wait five minutes to see if it turns green and if it is still flashing red then to reset the camera by pressing the reset button for two seconds. It takes around twenty seconds for the camera to come back on after being reset this way and can take a further five minutes to turn green.
Use an Internet browser and surf to the HomeMonitor website (https://monitor.y-cam.com/login.php) and to proceed through the rest of step-by-step installation process. The HomeMonitor website is where the primary configuration takes place.
The website wants the Camera ID (from the label on the back of the camera). If the camera is connected to a Wi-Fi connection a verification step will take place and the network cable will need to be removed. After this the camera position can be adjusted to get the best view. This is all that is required for the basic setup but there is more for those who wish to make additional adjustments and setting changes.
If the camera is to be used for home security then setting up motion recording zones will be a key feature. Motion recording sets detection zones to use as triggers to capture video only when a set amount of movement occurs within the defined detection zone. The HomeMonitor HD allows two detection zones to be configured and requires a user to draw a rectangle over a video frame where they wish to be alerted if motion occurs within that rectangle area.
Alerts can also be configured to when a motion detection event occurs an email with links to the live feed can be sent to a predefined user. An optional snapshot can be included in the email alert.
Other settings that can be configured include toggling the on-board camera microphone, night vision, email video snap attachment, and adjusting the video stream from standard quality or higher quality.
Keep in mind that the HomeMonitor HD is a cloud camera so the image feed cannot be accessed directly. Any captured images are sent to the HomeMonitor portal and can only be accessed via an Internet connection.
With this Y-Cam HomeMonitor IP-camera being an HD model, the bandwidth requirements will be higher than the previous version with a 3X increase in the number of pixels per frame.
The Live View section on the website provides access to the latest recorded video from the camera. As the website supports multiple cameras it would is a good practice to see all views on a single page and then click through to see each individual view.
The HomeMonitor app for mobile devices delivers an improved interface and additional features from the previous version and provides access to a full screen view of the latest recorded video and additional recordings can be started remotely.
Access to the latest week of recordings is available with each clip displayed by date in a list showing camera name, time of recording, duration, and a thumbnail image of the capture. Each clip can be replayed by tapping the thumbnail.
Each captured clip can also be shared using Facebook (accessed by tapping the full screen clip). In the future, it would be useful if the app could be able to download captured video and store it locally on a mobile device or share it using video service providers such as Wowza, YouTube or Vimeo.
In Summary:
The HomeMonitor continues to get better and better and the new HD functionality is the primary feature of this camera and the improvements to the website and app show the overall solution is growing into a system that should be given serious consideration when looking for an Internet or cloud security camera.

